If you’re just getting into Dorset Button making, or if you’ve been using a needle for the casting stage like I used to, let me show you a little trick that has completely changed the game for me and saved my hands in the process.
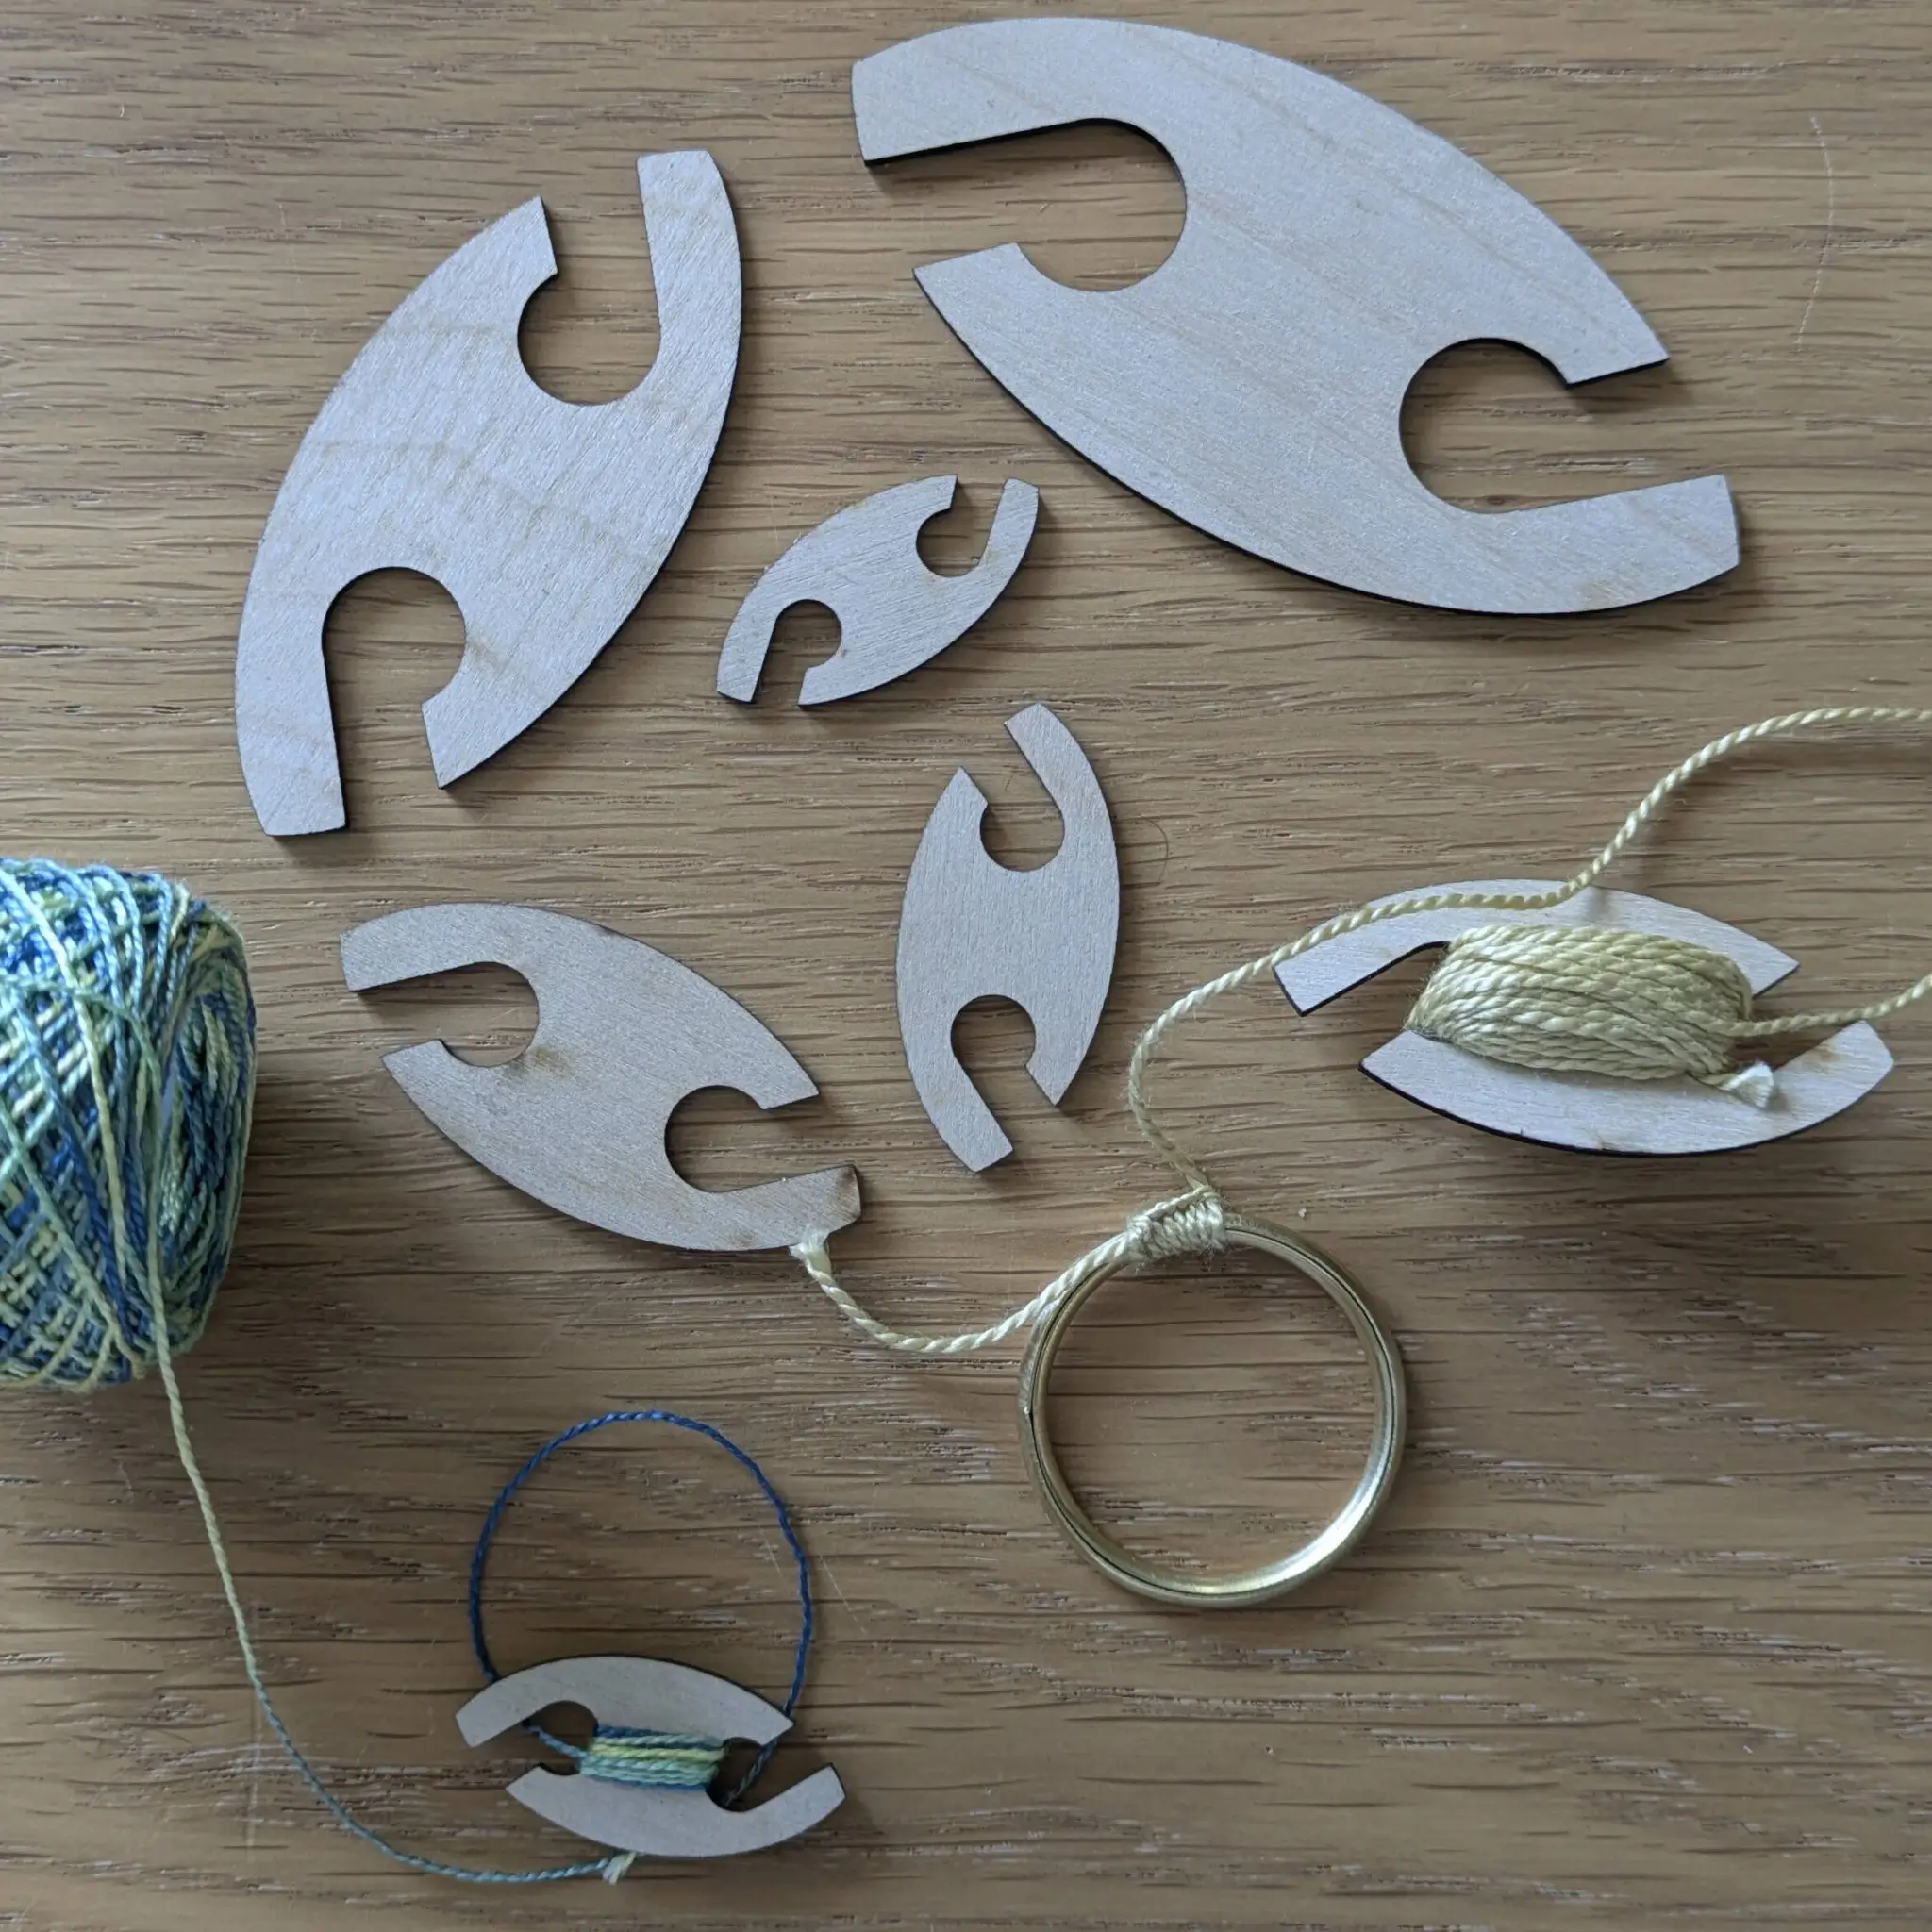
I’ve recently launched my own wooden thread shuttles (🎉 yay!), and in this post (and the video below), I’ll show you how I use them to start making a Dorset Button — or really, any button that begins with a casting stage.
👉 Watch the video here if you want a quick visual!
🧶 Not Just Easier—It’s Smarter
There are a few more reasons I now love starting with a shuttle:
- You can pre-wind enough thread for multiple buttons of the same colour.
- If you’re working on different designs at the same time, you can keep several colours ready on your pack of 5 shuttles.
- The shuttles are easier to hold than a needle for this step, and keep your thread nice and tidy too.
🔄 What Happens After the Casting Stage?
I did not show this in the video, but after you’ve finished casting:
- Unwind the rest of the thread off the shuttle.
- Thread it through a needle.
- Pass the needle through the first one or two stitches you made to “close” the casting — this isn’t essential, but I find it really neatens everything up and helps prevent gaps.
🧰 Want to Try It Yourself
I’ve just launched these laser-cut wooden shuttles in my shop! They come in packs of 5 — either five of the same size or one of each size — and are made from birch plywood.
🛒 Click here to check them out
I also sell two Dorset Button kits (Cartwheel and Yarrell), and moving forward, each one will now include a couple of these handy shuttles. If you already have a kit and want to understand how to use the shuttle, this post and video are for you!
🎓 Bonus: I Also Teach Workshops
If you’re someone who prefers learning in person, I also run Dorset Button workshops where I walk you through the entire process and explain how to use the tools properly, using the same step-by-step process that’s included in my kits.
If you’re the kind of learner who enjoys seeing things in action, you’ll be pleased to know there’s a workshop-style video I filmed a little while ago for the Ashfield Arts Festival (when everything was virtual!). 🧵 The Dorset Button section starts around 15 minutes in, and while I’ve made a few tweaks to how I teach it since then, the core technique remains the same. 🎥 You can watch that video here.
📣 Let Me Know What You Think!
Do you already use a shuttle, or are you curious to try it out? I’d love to hear what part of the button-making process you struggle with most — leave a comment or send me a message with your suggestions for future tutorials.
And don’t forget to like and subscribe to my YouTube channel if you found the video helpful. It really helps me out a lot — thank you! 💛
💡 Materials Used in the Video: